✨ Professional WordPress development, custom website builder, efficient on-line, cooperate and enjoy optimization services! 🚀


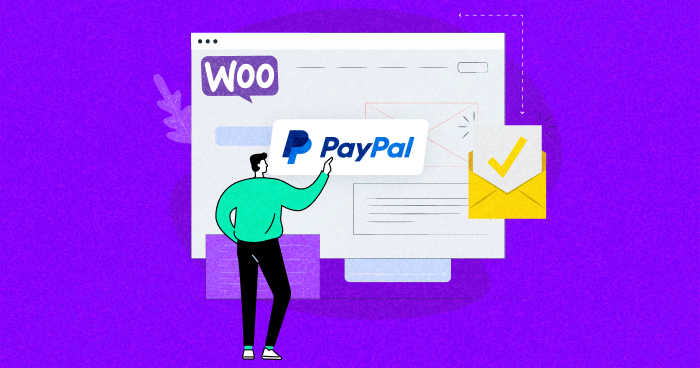
Are you running a WooCommerce store and looking for a reliable payment gateway to accept online payments from your customers?PayPal is the right choice for you!
As one of the most widely used and trusted payment gateways, PayPal provides a seamless and secure payment experience for merchants and customers.
In this blog post, we'll walk you through the process of setting up PayPal for your WooCommerce store so you can start accepting payments quickly and easily.
Whether you're a seasoned e-commerce veteran or just starting out, this guide will help you streamline the customer payment process and increase your online sales.
Well, let's get started!
Why use PayPal payment gateway for WooCommerce?
As a WooCommerce store owner, you have severalPopular payment gatewaysOptions include Stripe, Skrill, and PayPal. however, PayPal is the most reliable option.
outweigh29 million merchants using PayPal by 2023It's a popular choice in the industry to run and grow their business. Customers around the world trust PayPal with their sensitive financial information, such as credit card details and banking information.
One of the main advantages of using PayPal for WooCommerce is its ease of use.PayPal offers a user-friendly checkout experience that simplifies the payment process and allows your customers to pay using a variety of methods, including credit and debit cards, bank transfers, and even PayPal's own digital wallet.
In addition, PayPal offers excellent customer support, with a team available 24/7 to help you resolve any issues. In addition, you get access to advanced fraud protection and security measures to protect your business and your customers' data.
Finally, PayPal's competitive pricing makes it an affordable option for businesses of all sizes. With no setup or monthly fees and only a small transaction fee, PayPal can help you reduce costs and maximize your profits.
Hosting Your WooCommerce Flexible Managed Hosting On Store
With Cloudways PAYG pricing, you don't have to worry about traffic spikes and can easily scale whenever you want.
PayPal for WooCommerce: Features and Benefits
PayPal for WooCommerce offers a globally recognized, user-friendly and secure payment gateway with a variety of features to enhance your store. Its international support, multiple currencies and multiple payment options make it ideal for business growth.
Plus, with advanced fraud protection, SSL encryption and two-factor authentication, PayPal ensures secure transactions. Plus, you'll enjoy 24/7 customer support and competitive pricing with no setup or monthly fees.
Here's a list of some of the benefits you get with PayPal for WooCommerce:
- Global coverage:Accepted in over 200 countries and supporting multiple currencies, PayPal is ideal for international businesses.
- User-friendly checkout:Its simple checkout process supports a variety of payment methods, including credit and debit cards, bank transfers, and PayPal's digital wallet.
- Secure Payment Gateway:PayPal has advanced fraud protection, SSL encryption and two-factor authentication to keep your transactions safe and secure.
- Reliable customer support:PayPal offers a dedicated team of 24/7 service providers.
- Competitive pricing:PayPal helps you save money on payment processing by not charging setup or monthly fees.
Now that you know the benefits of using PayPal as a payment gateway on your WooCommerce store, let's learn how to integrate PayPal and WooCommerce.
How to create a PayPal Sandbox account (pre-integration)
A PayPal Sandbox account provides a secure and isolated environment for testing payment gateway operations before making actual transactions. This is especially important for WooCommerce stores that have uploaded inventory and installed the payment gateway but have not yet tested it.
Let us walk you through the process of setting up your PayPal Sandbox account and integrating it with your WooCommerce store.
Login to PayPal Developer Site
- switch to PayPal Developer SiteThe
- click (using a mouse or other pointing device) Login into Dashboard Button.

- You can set up a new PayPal account or log in to an existing one.

- Select your country's location, enter your email, and create a new password.

- After creating your account, you will seecontrol paneland error logs.

- That's it. You have successfully created a PayPal Sandbox account. The next major step is to connect PayPal to your WooCommerce store.
How to Integrate PayPal with WooCommerce (Simple Steps)
Here's how to integrate PayPal with WooCommerce:
- Sign in to access your WooCommerce store.

- Your WooCommerce store is now ready.

Now your WooCommerce store is up and running. It's time to install the PayPal payment plugin in your store.
- Go to your WordPress dashboard and click "plug-in (software component)".
- Click "Add New" and in the search box type "WooCommerce PayPal Payments".

- Find the plugin and click "Installation".
- After installation, click "activate" to activate the plug-in.
- Navigate to WooCommerce > set up > disbursements.
- Click the toggle buttonto enable PayPalThe

Configuring PayPal Settings
When you click the PayPal toggle button, a new tab appears on the screen prompting you to activate PayPal.
- Check the box "Safe Acceptance Frame"to ensure the security of the transaction.

- Select the PayPal integration option you want.
- Scroll down and click "Testing Payments with PayPal Sandbox" to test your settings.

- You will need a PayPal Sandbox email account and password to connect your PayPal.
Attention:If you do not have a Sandbox account, please move to thethis partto create one.
- If you already have one, go to your PayPal Sandbox account and click "Sandbox test account".

- Click "View/Edit Account" to check your email and password.

- Copy yourSandbox Email IDrespond in singingsystem-generated passwordThe
- Go back to WooCommerce PayPal Payments settings and paste your details.

- Click "Agree and connect" to connect your PayPal account.

- Once the setup process is complete, you will see a message indicating that you have successfully configured PayPal for your WooCommerce store.

- Go back to your WooCommerce store and check the Payments section to see if your store is associated with a PayPal Sandbox account.
- In this section, you can set up PayPal settings (such as PayPal Standard Payment Settings), customize the appearance of PayPal Checkout, display a Pay Later message, and more.

PayPal Configuration
Now it's time to configure your PayPal settings. In the WooCommerce PayPal Payments settings, you'll find a variety of options that you can customize to fit your needs.
Take some time to explore the different options and make the necessary changes to ensure your PayPal checkout experience is seamless and efficient for your customers. Some of these options include:
- Standard payment setup
- cashier's office
- single product page
- rook (in Chinese chess)
- Mini Stroller
Now let's explore each of these options in detail:
Standard payment setup
In this section, you can customize various settings of the PayPal Standard payment gateway, including the title and description that is displayed to customers during the checkout process.

- Title:Specify the title you want customers to see on the checkout page.
- Description:Enter a description to be displayed at checkout.
- Intent:You can choose between two options - Capture and Authorize. The Capture option is for immediate payment, while the Authorize option is for payment authorization after the order is created.
- Immediate payment:You can enable instant payment transfers by checking this checkbox.
- Brand:Add your brand name to the PayPal checkout process.
- Landing page:You have two options to choose from - Login and Billing page.
- Hide the source of funds:By default, all funding options will be displayed. However, you can use the "Hide Funding Sources" option to hide funding sources from credit or debit cards, Venmo and other payment methods.
- Vaulting horses:Enabling this option will allow users to save their payment information, including PayPal and credit card accounts.
Card Billing Data Processing: This function ensures that the billing information entered matches the billing data in the checkout process. - Separate the Card Button from the PayPal gateway:This option creates a second gateway for card payments, separate from the main PayPal gateway.
PayPal Smart Button
In this section, you can modify the appearance of the PayPal Smart Button to match the design and branding of your website.
- Smart Button Location:Select the page on which you want to display the PayPal Smart Button.
- Customize smart buttons by location:It will create a separate settings section for selected smart button pages such as checkout pages, individual product pages, shopping cart pages and mini carts.

checkout button
This section of the settings will allow you to change and customize the display/style on the PayPal checkout page.

- Button Layout: Select between vertical and horizontal options to set the button layout.
- Button labels: Choose from several options to display labels on your PayPal button, such as PayPal, PayPal Checkout, and more.
- color: Sets the background color of the button.
- geometry: Select the shape of the button.
Individual product page buttons
This section is dedicated to customizing the style and design of individual product page buttons.

Individual product pages offer the same fields and styling options as the Checkout section.
Shopping cart button
This section allows you to customize the checkout design and appearance of the shopping cart page.

The Cart Products page offers the same fields and styling options as the Checkout section.
Mini Shopping Cart Button
In the Mini Cart section, you can customize the appearance of the PayPal checkout button.

This section shares the same design options as the main Checkout section, including the ability to adjust the button height to your liking.
By default, brand new WooCommerce installations offer payment options such as:
- Direct bank transfer
- Cheque payments
- cash on delivery (COD)
