


When dealing with apparel, accessories, building materials, or any specification-based products, the more clearly variable products are configured, the lower the customer service communication cost and the more stable the front-end conversion. This tutorial walks through attribute creation, variation generation, and inventory management in one go, suitable for stores that need to manage color, size, and model simultaneously.
Variable products and variation swatches are not the same thing.
Swatch plugins address the front-end display experience, while WooCommerce variable products determine the backend data structure. If you haven't properly configured attributes, SKUs, inventory, and default options, simply adding swatches won't simplify order and inventory management.
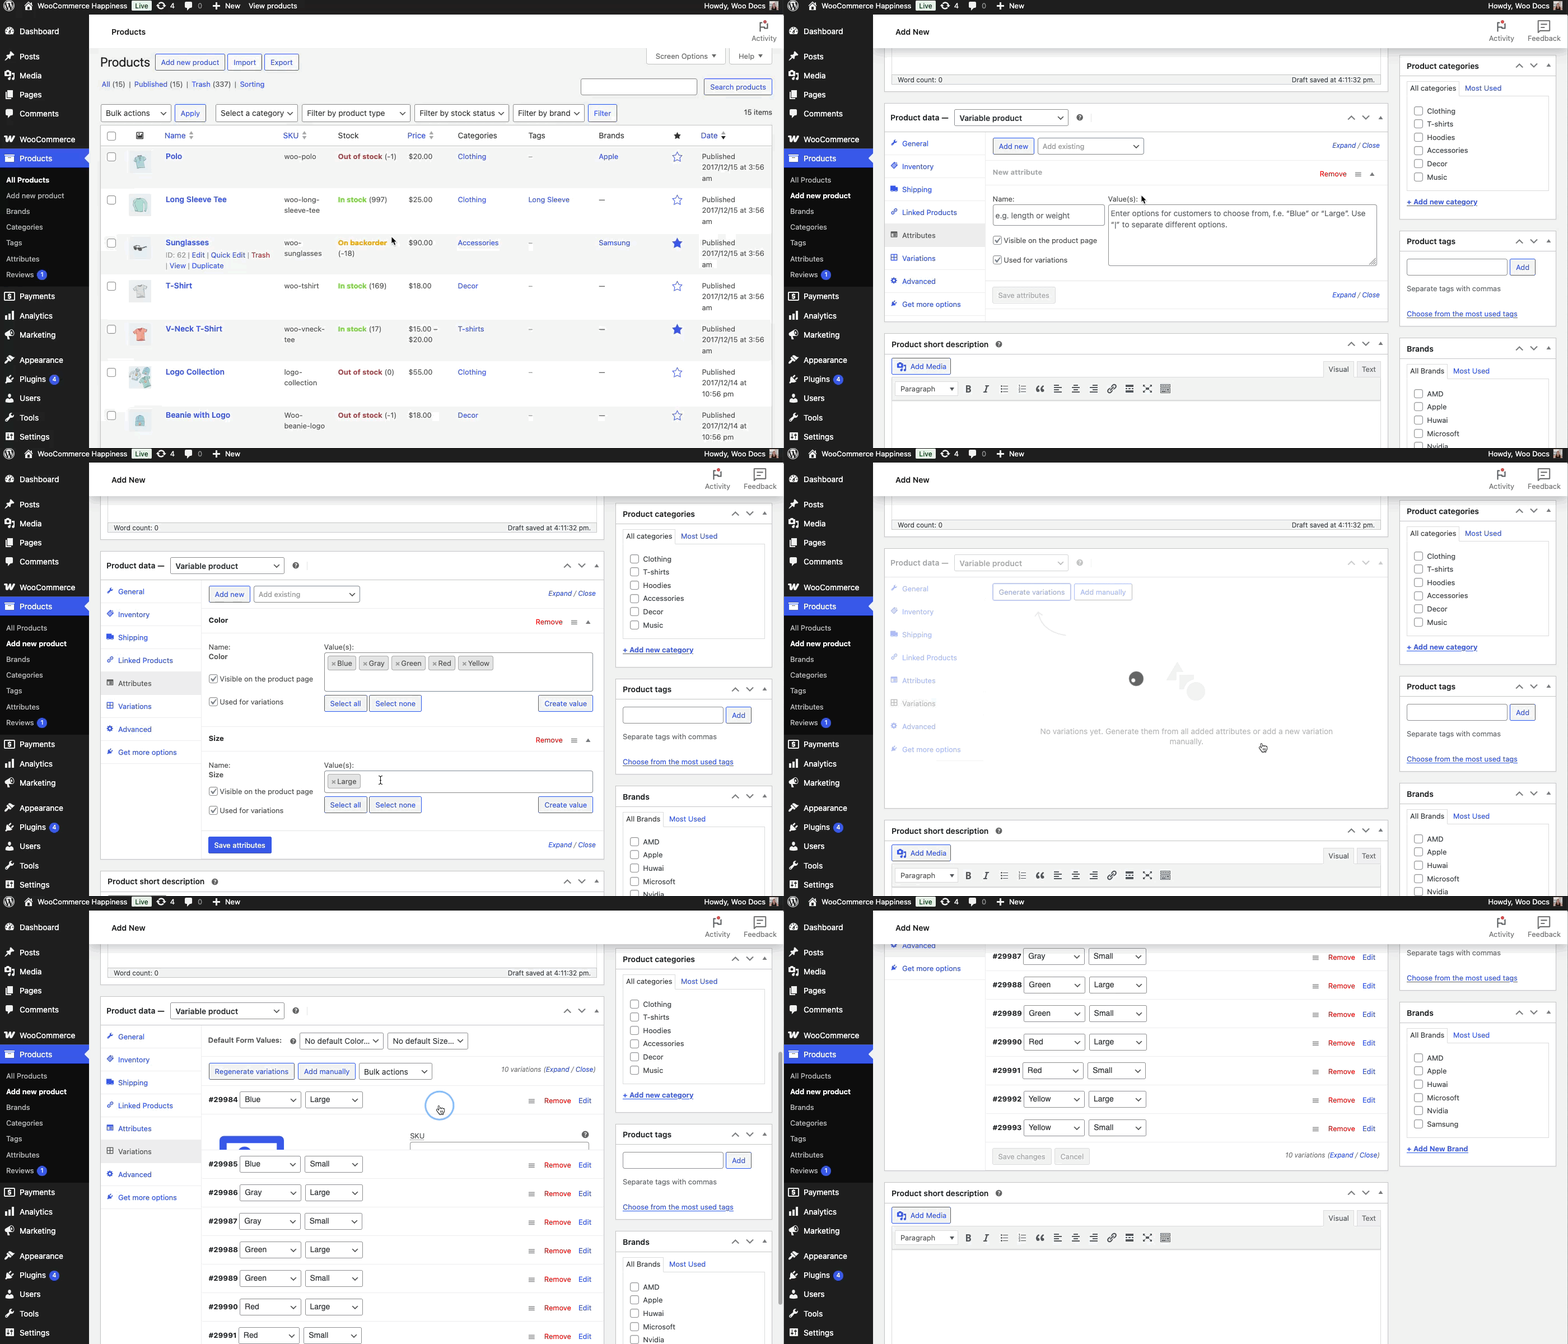
Configuration process after switching product type to variable product. Image source: WooCommerce official documentation screenshot, used for tutorial reference.
Step 1: Switch the product type to variable product
After creating the product, first change the product type to Variable product, then enter the Attributes and Variations sections. It is recommended to list the actual specifications that exist in your business, such as color, size, and capacity, rather than stuffing marketing copy into attributes.
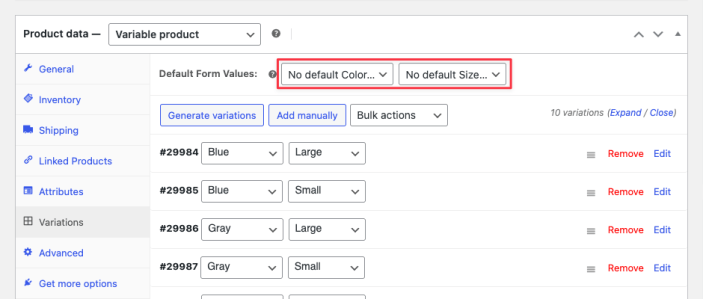
A default variation reduces the selection cost for users when they first enter the product page. Image source: Screenshot from WooCommerce official documentation, used for tutorial reference.
Step 2: Generate variation combinations using attributes
After the attribute values are defined, all variations can be generated in bulk. However, not all combinations must be kept; when there are many SKUs, delete non-existent combinations to prevent front-end users from selecting out-of-stock or invalid variations.
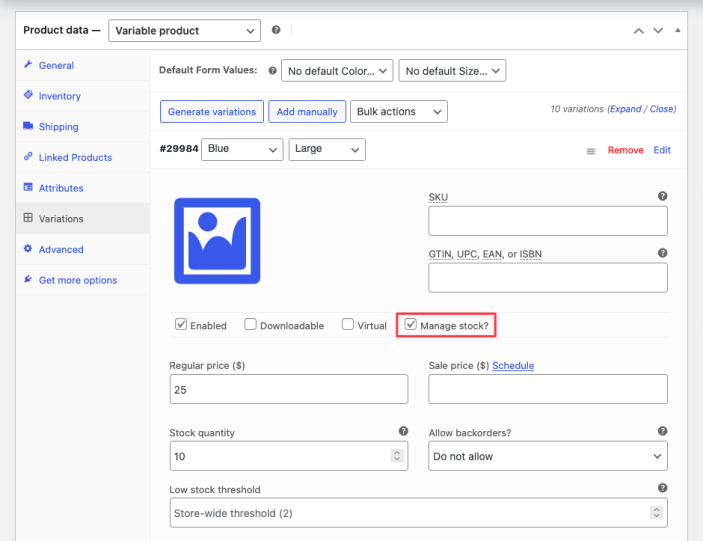
When different colors or specifications require individual stock deduction, inventory should be set at the variation level. Image source: Screenshot from WooCommerce official documentation, used for tutorial reference.
Step 3: Set images, prices, and inventory for key variations
If different colors correspond to different main images, upload images at the variation level. If different specifications have different inventory, manage inventory separately at the variation level, rather than just entering a total inventory at the parent product level.
Step 4: Set default options and test placing an order
A default variation reduces the blank state when users first enter the product page, especially on mobile. When testing, check that every sellable variation has a price, stock, and the ability to be added to the cart.
Pre-launch checklist
- Keep only real attributes and values, avoid invalid combinations.
- Important variations have individually set prices, images, and inventory.
- Default variation has been configured, so the product page won't be blank on mobile when opened for the first time.
- In the SKU and order backend, different specifications can be distinguished.
- Front-end variation switching, stock prompts, and add-to-cart flow have been tested.
After configuring the variable product, the next step is not to rush to publish it, but to review the product data structure: you can cross-reference the specification sources. WooCommerce product attribute settingsCategory archive reference Product category managementIf you also need to display specifications on the frontend using colors, images, or buttons, then refer to it. Variation swatches tutorial。
Frequently asked questions
What is the difference between attributes and variations?
Attributes are the specification dimensions themselves, such as color and size; variations are the specific sellable products formed by combining these attribute values, such as Black XL.
Do all attributes need to generate variations?
No. Only attributes that affect pricing, inventory, SKU, or purchase decisions are recommended to generate variations; other information can remain as display-only attributes.
Why does the frontend image not change after I switch variations?
Usually, it is because no image was uploaded separately at the variation level, or the theme/plugin does not correctly read the variation image field. First, verify whether the variation images actually exist in the WooCommerce backend.
Join the discussion
You must log in to post a comment.
After logging in, you can join the discussion. New users can register an account for free.
Do not post spam comments, advertisements, or content with malicious links. Comments must comply with relevant laws, regulations, and community guidelines.